Today, I’m going to walk you through a super simple method to install Windows 11 on unsupported PCs in 2025. Now, you might be thinking, “Is this even worth trying?” Absolutely! If your PC is currently running Windows 10 and you’re eager to upgrade to Windows 11 but your PC doesn’t meet the official requirements, this guide is exactly what you need. I’ll show you how to Install Windows 11 on an Unsupported PC very easily, without crashing your system or losing any of your important files. Let’s get started!
This guide doesn’t also require your PC to have official TPM 2.0 and Secure Boot requirements. This method skips TPM 2.0 and Secure Boot features and lets you install Windows 11 easily on your older Windows 10 PCs.
How to Install Windows 11 on Unsupported PC in 2025 – Super Easy Method
Just follow my steps, and you’ll have Windows 11 running smoothly on your old PC. Let’s get started!
Step 1: Check Your PC’s Processor and Requirements
First, let’s check if your PC can handle Windows 11. Here’s how:
- Right-click on This PC and select Properties.
- Look for your processor details. For example, mine is an Intel(R) Core(TM) i3-2100 CPU, which is unsupported for Windows 11.
- Check the minimum requirements for Windows 11:
- Processor: 1 GHz or faster with 2 or more cores.
- RAM: 4 GB minimum (8 GB recommended).
- Storage: 64 GB or larger.
- System: 64-bit processor (32-bit is not supported).
If your PC meets these basics, you’re good to go!
Step 2: Enable TPM 2.0 and Secure Boot
Even if your PC is unsupported, enabling TPM 2.0 and Secure Boot can help. Here’s how:
- Restart your PC and enter the BIOS/UEFI settings (usually by pressing F2, F10, or Del during startup).
- Look for TPM 2.0 and Secure Boot options and enable them.
- Save changes and exit.
If you’re unsure how to do this, check out my other video tutorial linked in the description.
Step 3: Download the Windows 11 ISO
Now, let’s download the Windows 11 ISO file:
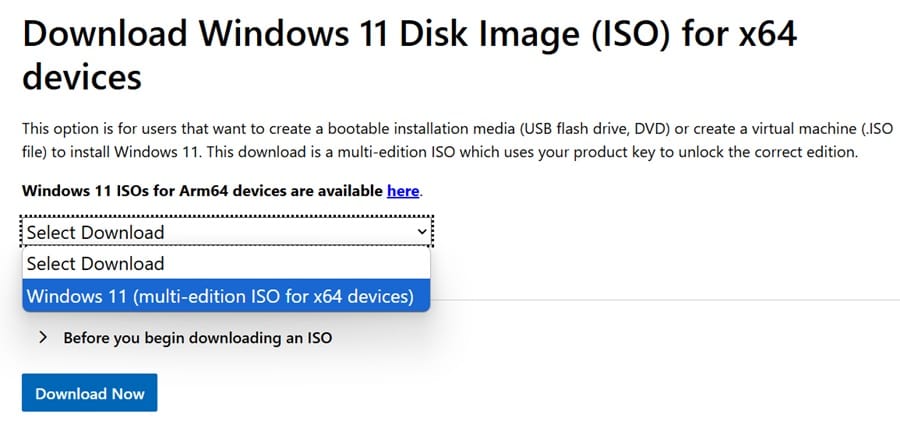
- Go to the official Microsoft website and download the Windows 11 Multi-Edition ISO.
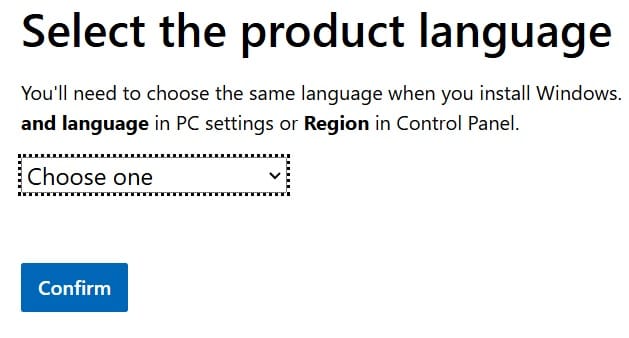
- Make sure to select the same language as your current Windows 10 installation. But if you are from Canada or the United Kingdom select English International.
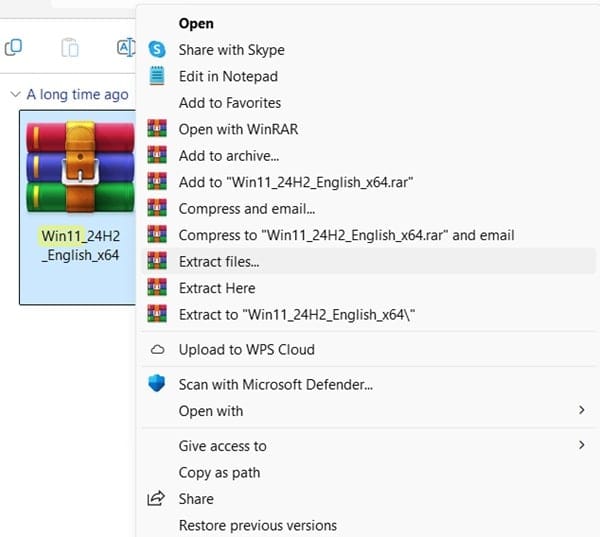
- Once downloaded, extract the ISO file using WinRAR or 7-Zip (both are free).
Step 4: Create a Setup File to Bypass Requirements
This is where the magic happens! We’ll create a simple setup file to skip the TPM and Secure Boot checks:
- Open the extracted ISO folder.
- Right-click inside the folder and create a New Text Document.

- Name it
setup.txtand open it.

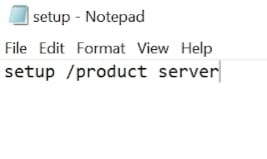
- Type the following command:
setup /product server
- Save the file and rename it to
setup.bat(make sure to change the file extension from.txtto.bat).
Step 5: Run the Setup File
Double-click the setup.bat file to start the installation. Here’s what to expect:
- A prompt will appear asking for permission to make changes. Click Yes.

- The Windows 11 setup will launch, skipping all the unsupported hardware checks.
- Now, skip the updates by clicking on the option Not Right Now.
- Accept the License terms
- Now, Choose to Keep personal files and apps during the installation process.
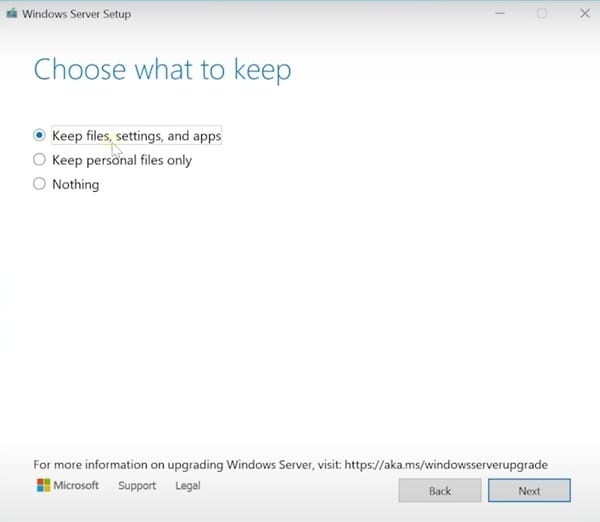
- Click Install the begin the Windows 11 installation.
Step 6: Complete the Installation
The setup will take some time, and your PC will restart multiple times. Once it’s done, you’ll be greeted with the latest version of Windows 11!

Important Tips
- Backup Your Data: Before starting, make sure to back up all your important files to an external drive or another partition (like D: drive).
- Avoid 24H2 on Very Old PCs: If your PC has a Core 2 Duo or older processor, stick to Windows 11 23H2 to avoid crashes.
- Keep Your System Updated: After installation, check for updates to ensure your system runs smoothly.

Final Thoughts
And that’s it, friends! You’ve successfully installed Windows 11 on an unsupported PC in 2025. It’s super easy, and I’ve covered everything you need to know. If you found this guide helpful, don’t forget to share it with your friends and leave a comment below.
As always, I wish you the best for 2025. Stay tuned for more tutorials, and I’ll see you in the next video! God bless!


